Selected the DelimitedText option as in Figure 3-29, as our data is in the CSV format in the data lake. Click on Continue.
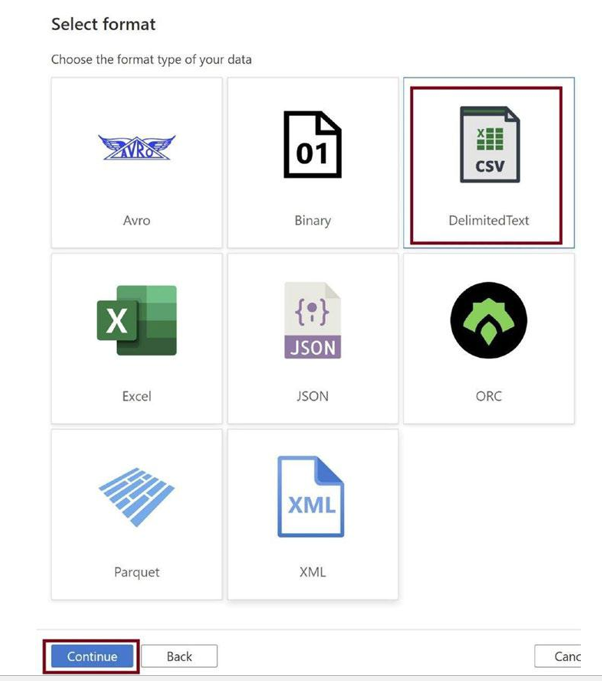
Figure 3-29. Select file format
Create a new linked service, with which we will connect to the data lake, as in Figure 3-30. Click on +New.
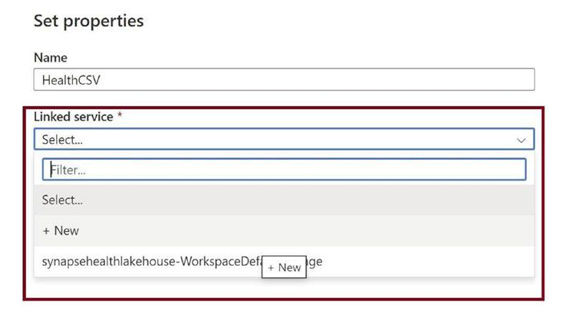
Figure 3-30. Create a new linked service
Select the data lake and test the connection to the data lake, as in Figure 3-31. Then click on Create.
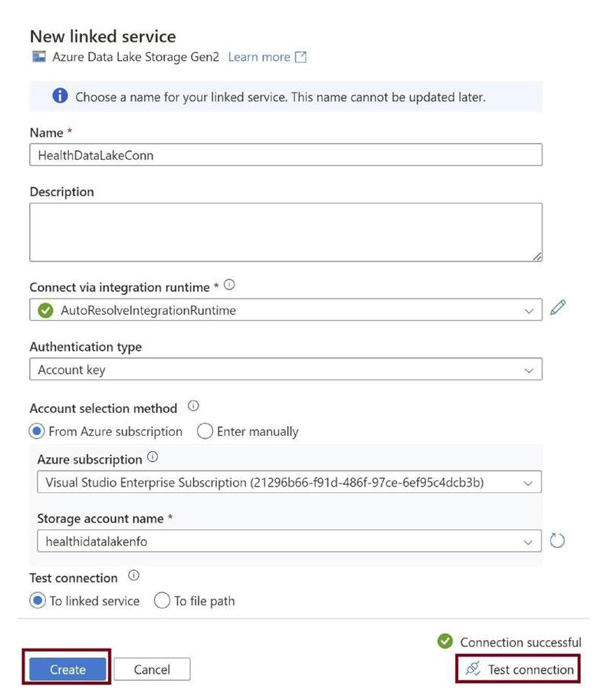
Figure 3-31. Test connection and click Create
Provide the file path for the CSV file stored in the data lake raw folder, as in Figure 3-32, and then click on OK.
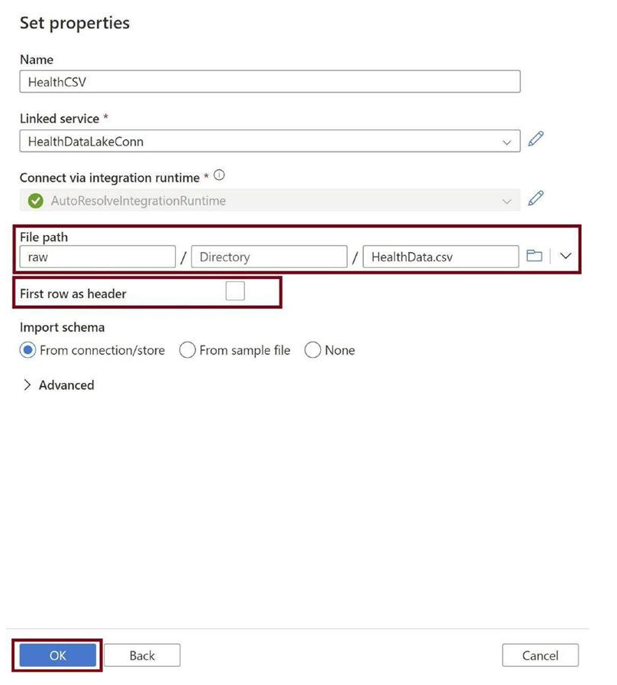
Figure 3-32. Provide file path
Now let us configure the sink. Go to the Sink tab and click on +New to add the destination dataset, as in Figure 3-33.
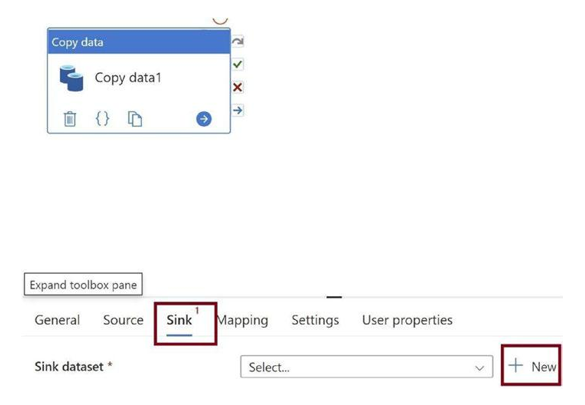
Figure 3-33. Configure sink
Search for Azure Data Lake Storage Gen2 and select it. Click on Continue as in Figure 3-34. We need to have our processed data in the Azure Data Lake Gen2 that is built on top of the storage blob.
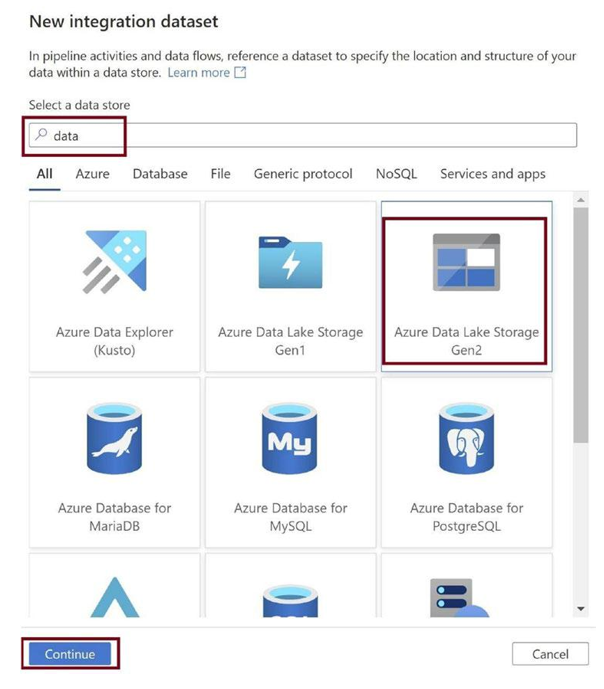
Figure 3-34. Select the destination data store
Selected the Parquet option, as in Figure 3-35, as we need to transform our data into the parquet format in the data lake. Click on Continue.
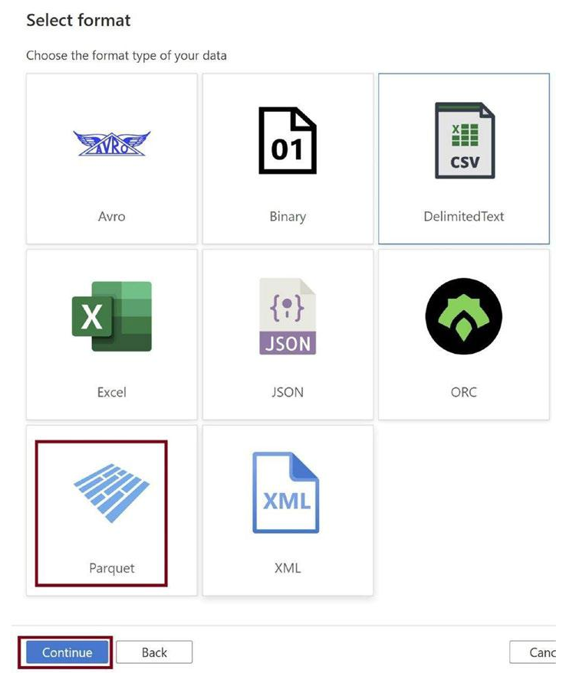
Figure 3-35. Select destination data format
Provide the file path for the processed folder, as in Figure 3-36. We need to keep the parquet file in this folder. Click on OK.
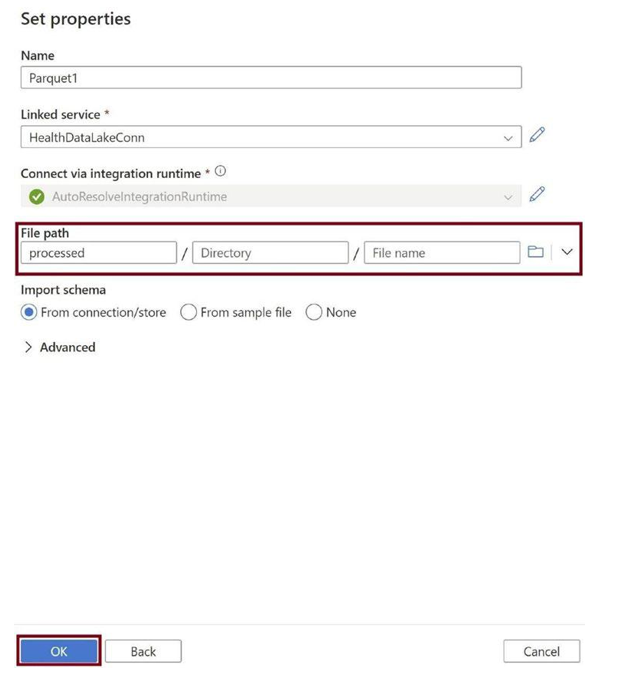
Figure 3-36. Provide file path
Click on Open, as in Figure 3-37. We need to edit the destination dataset to meet our needs.
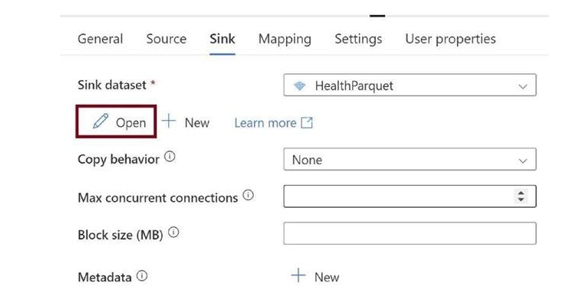
Figure 3-37. Click Open
Provide the name of the parquet file, as in Figure 3-38. A parquet file will get created with this name.

Figure 3-38. Provide destination file name
Scroll down and check the First row as the header option, as in Figure 3-39. We need to explicitly specify this. Click on OK.
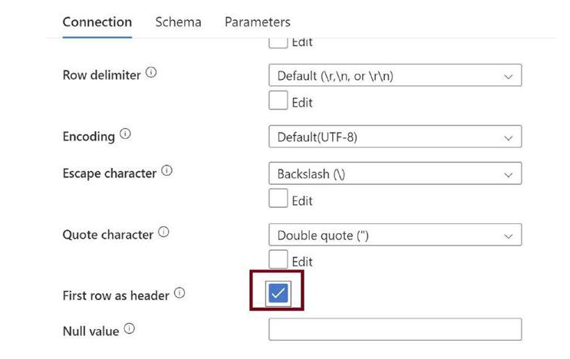
Figure 3-39. Check the first row as the header
Go to the Mappings tab and click on Import Schemas, as in Figure 3-40. Make changes to the data types if needed.
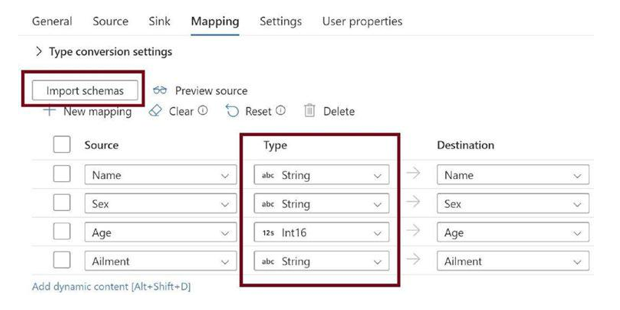
Figure 3-40. Configure mapping
Click on Publish all, as in Figure 3-41. This will publish the pipelines and all other work.
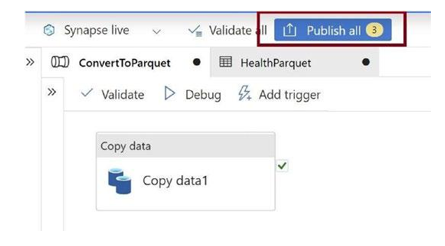
Figure 3-41. Publish changes
Click on Trigger Now in the Add trigger menu, as in Figure 3-42. This will execute the data pipeline.
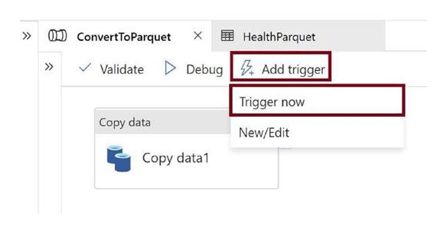
Figure 3-42. Trigger pipeline
Once the pipeline execution is complete, go to the processed container in the data lake, as in Figure 3-43. You can see the parquet file created.
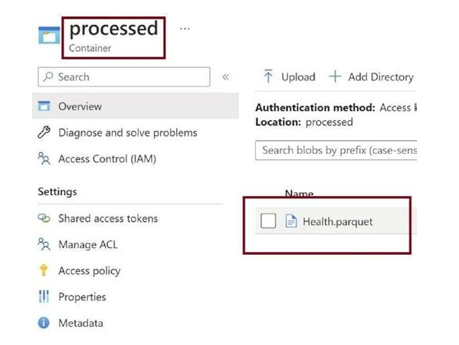
Figure 3-43. Parquet file created in the processed container in data lake


